Smash Burger Tacos (Crispy Viral Cheeseburger Tacos)
This post may contain affiliate links. Read my disclosure policy.
I put off making smash burger tacos for the better part of a year because I assumed they were a trend that photographed better than it tasted. Then my nephew made a batch in my kitchen on a Sunday afternoon, handed me one straight off the spatula, and I stood at the stove and ate three in a row without ever sitting down. The tortilla does something I did not expect. It soaks up the beef fat as the patty sears, puffs slightly, and crisps into something halfway between a taco shell and a griddled bun.
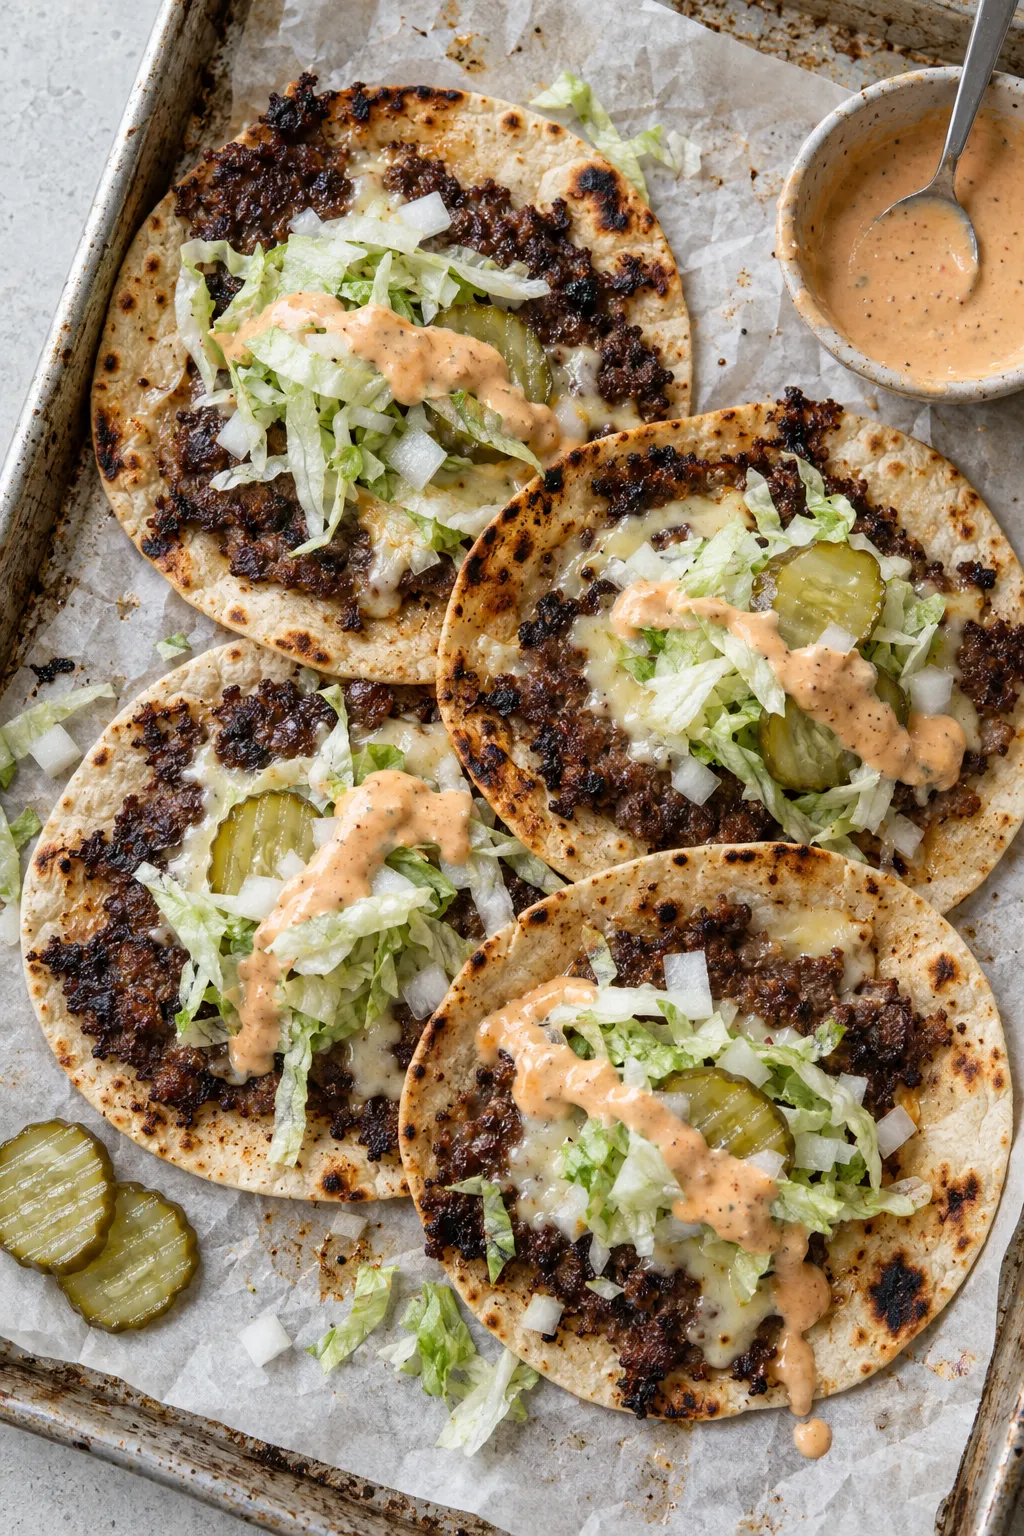
That is the whole trick. You are not putting a burger inside a taco. You are smashing the beef and the tortilla together in a screaming hot skillet so the two fuse into one piece, then folding it around melted American cheese, cold shredded lettuce, pickles and a tangy burger sauce. Thirty five minutes, one pan, and no buns to buy.
Why You Will Love This Recipe
- It is genuinely fast. The sauce takes five minutes, the patties take five, and each taco cooks in about six. Dinner is done before the oven would have finished preheating.
- One skillet, no grill. A cast iron pan on the stove gives you a better crust than most backyard grills ever will.
- Cheap ingredients. A pound and a half of ground beef and a pack of street taco tortillas feeds four people generously.
- Kids eat them without negotiation. Mine call them crunchy cheeseburgers and I have stopped correcting them.
- Everything is customisable. Set the toppings out in bowls and let everyone build their own.
What Are Smash Burger Tacos?
Smash burger tacos started on TikTok and turned into one of those rare viral recipes that actually deserved the attention. You take a loose ball of 80/20 ground beef, drop it into a very hot dry skillet, lay a small flour tortilla on top, and press down until the beef spreads out to the width of the tortilla. The patty sears on the bottom while the fat renders upward into the tortilla. When you flip it, the tortilla crisps in that rendered fat and the beef is already cooked through.
What you end up with is a burger with a proper browned crust, carried on something that eats like a griddled taco. The tortilla replaces the bun, which means far less bread and far more beef in every bite. Top it the way you would a classic drive-through cheeseburger – American cheese, shredded iceberg, raw onion, dill pickles and a mayonnaise-ketchup sauce – and you have a flavour everyone recognises in a completely different shape.
Ingredients You Will Need
Nothing here is unusual. What matters is the beef and the tortillas, so those are the two places not to economise.
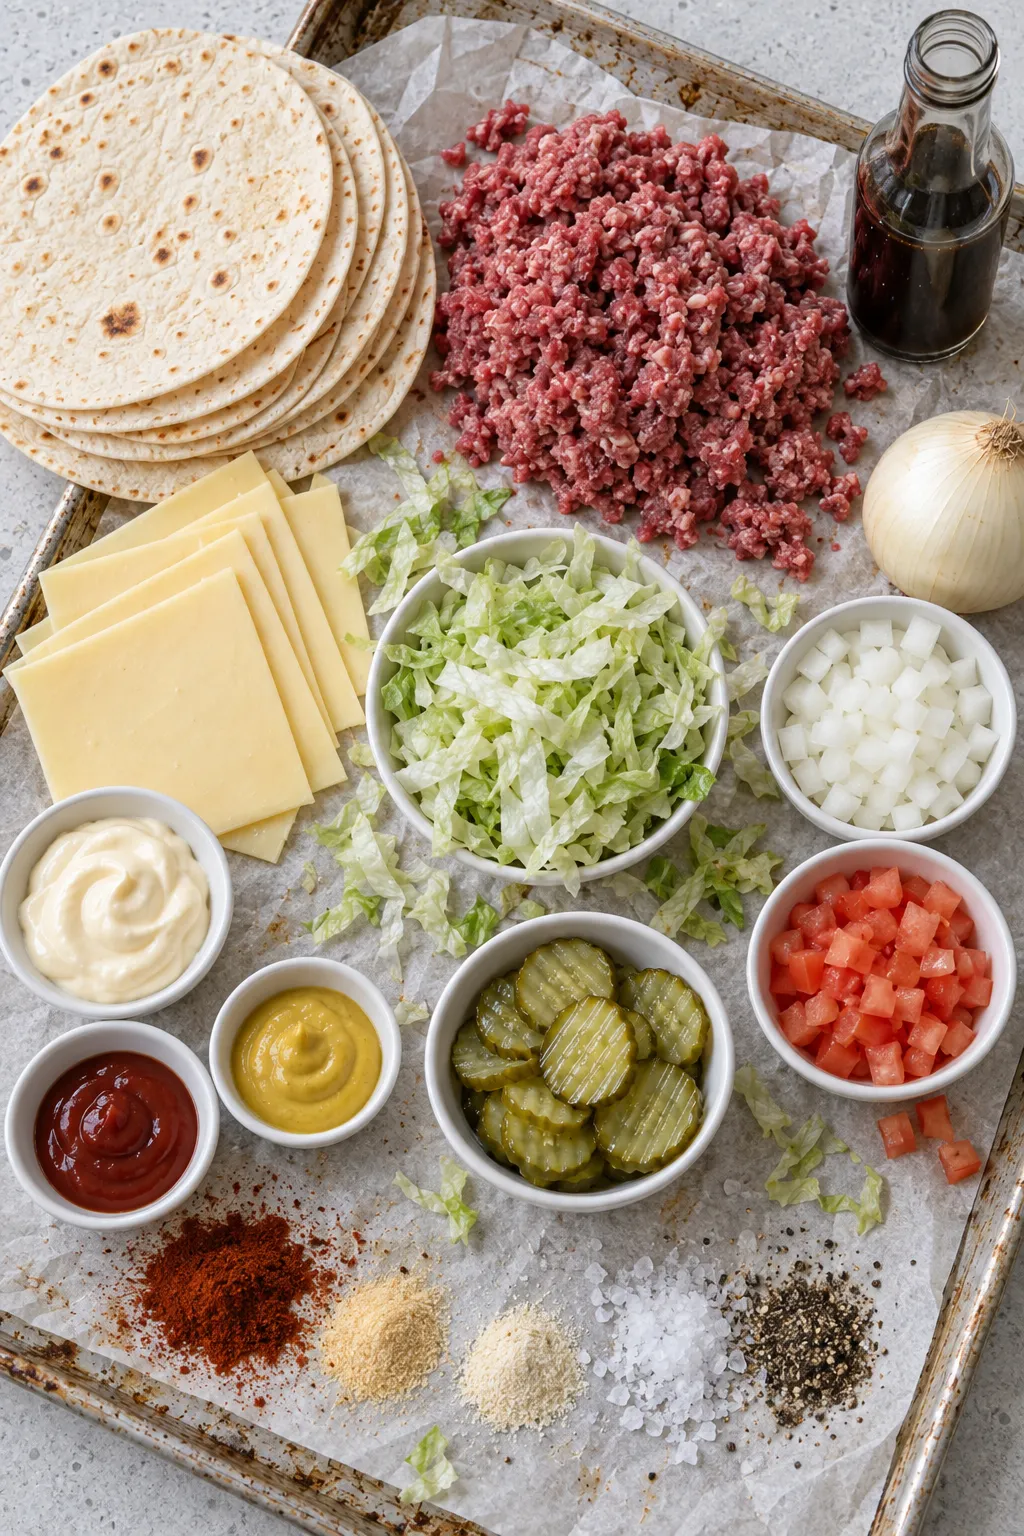
- Ground beef, 80/20. Non-negotiable. The fat is what renders into the tortilla and crisps it. Leaner beef gives you a dry patty and a limp, sad tortilla.
- Flour tortillas, six inch. Street taco size. Flour tortillas are absorbent and flexible enough to fold; corn tortillas crack and refuse to bond with the meat.
- American cheese. It melts at a low temperature, which is exactly what you need when the pan is already off the heat. Muenster or provolone work if you would rather, but they need a little longer.
- Mayonnaise, ketchup and mustard. The backbone of the burger sauce. Use full fat mayonnaise.
- Dill pickles and their brine. The brine goes into the sauce and cuts through all that richness. Do not skip it.
- Worcestershire, paprika, garlic and onion powder. These four turn plain mayonnaise into something that tastes like a burger joint.
- Iceberg lettuce and white onion. Shredded and diced small. The cold crunch against the hot beef is half the point.
How to Make Smash Burger Tacos
Step 1: Mix the burger sauce
Whisk the mayonnaise, ketchup, mustard, chopped pickles, pickle brine, Worcestershire and all the seasonings together until the sauce is smooth and evenly pale orange. Cover it and put it in the refrigerator. It genuinely improves in the twenty minutes it sits there, so this is the first thing to do.

Step 2: Prep every topping before you turn on the heat
Shred the lettuce finely, dice the onion small, drain the pickles, dice the tomato if you are using it. Once the skillet is hot the tacos come off the pan one after another and you will not have a spare thirty seconds to chop anything.
Step 3: Roll the beef into loose balls
Divide the cold beef into eight portions of about three ounces and roll each into a loose ball. Loose is the important word – squeezing and compacting the meat makes the patties tough. Season them all over with the salt, pepper and garlic powder and put them straight back in the refrigerator while the pan heats. Cold meat hitting a very hot surface is what produces that dark lacy crust.

Step 4: Get the skillet genuinely hot
Cast iron over high heat for a full five minutes. Flick in a drop of water – it should skitter across the surface and disappear. Leave the pan dry unless it is new or badly seasoned, in which case the barest film of neutral oil is enough. The beef brings all the fat this recipe needs.
Step 5: Smash the beef under the tortilla
Drop a beef ball into the pan, lay a tortilla flat on top of it, and press down hard with a wide metal spatula or a burger press until the meat spreads right out to the edge of the tortilla. Lean on it for about ten seconds. Do two at a time so the skillet stays hot – crowding it is the fastest way to end up steaming the meat instead of searing it.
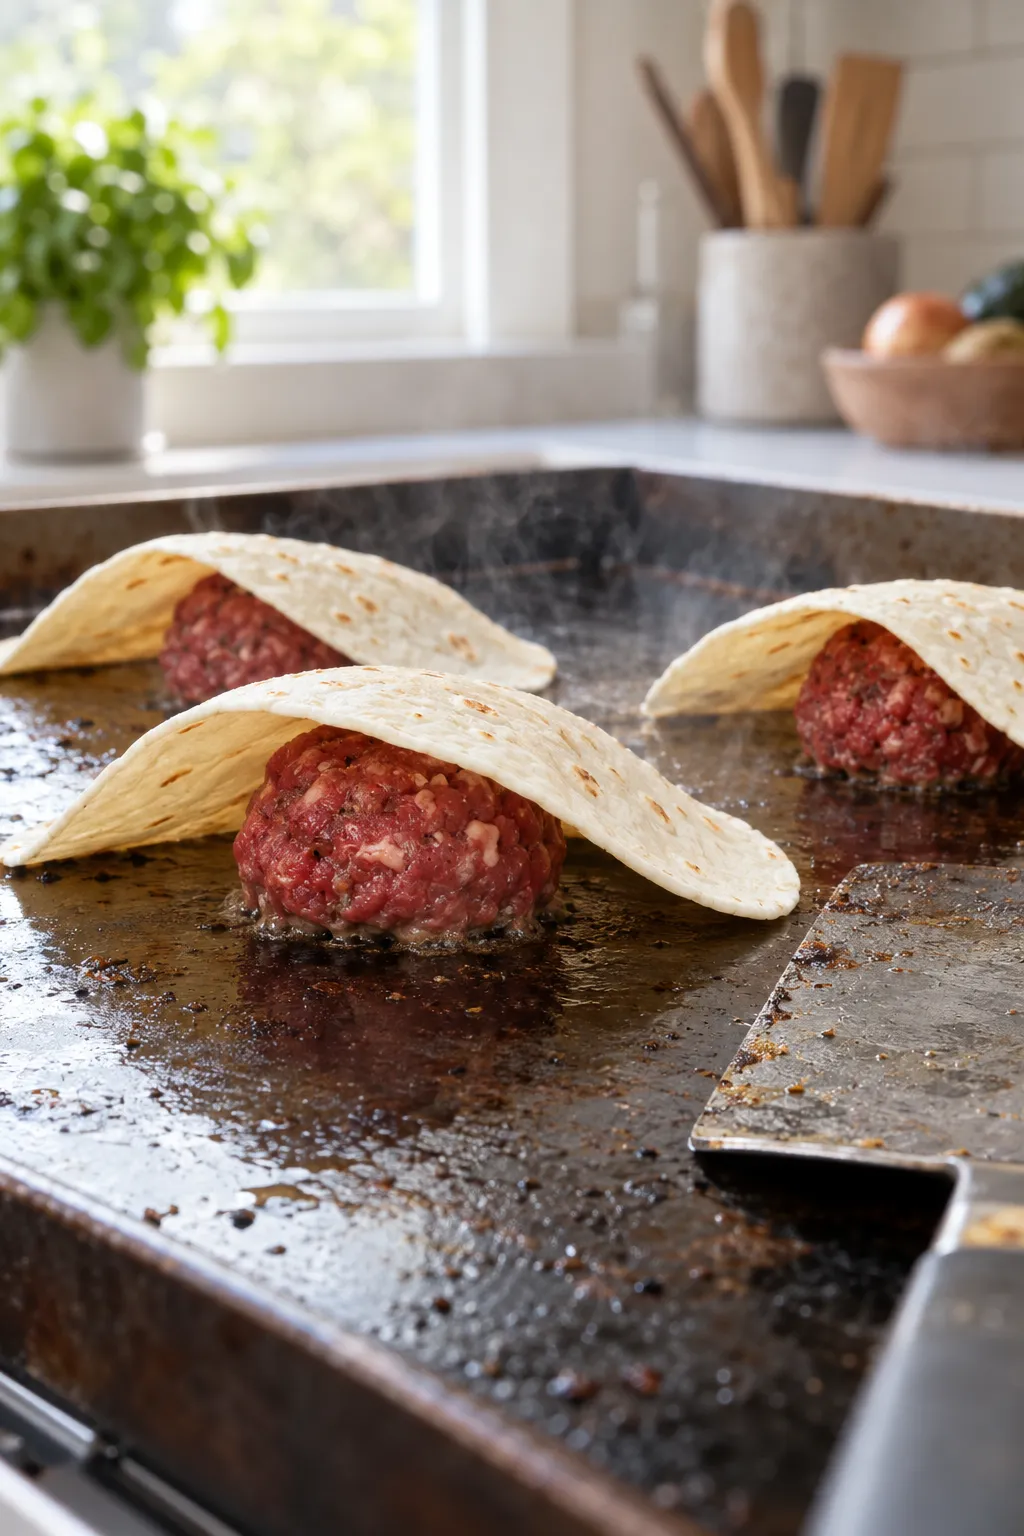
Step 6: Leave it alone for three to four minutes
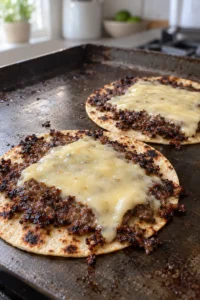
Do not poke it, do not lift it to check. The edges will darken and go lacy and you will see the tortilla change colour as the fat soaks upward. Then slide a stiff metal spatula underneath at a low angle and scrape rather than lift. The entire crust should come away with the taco. If it is still pale and sticking, the pan was not hot enough – turn the heat up a notch for the next batch.

Step 7: Flip, drop the heat, add the cheese
Turn the taco over so the tortilla is against the pan and immediately take the heat down to low. Lay a slice of American cheese on the beef. One to two minutes is all it takes for the cheese to slump into the crust and the tortilla to puff and crisp. If the tortilla is colouring faster than the cheese is melting, switch the burner off entirely and let the residual heat finish the job.
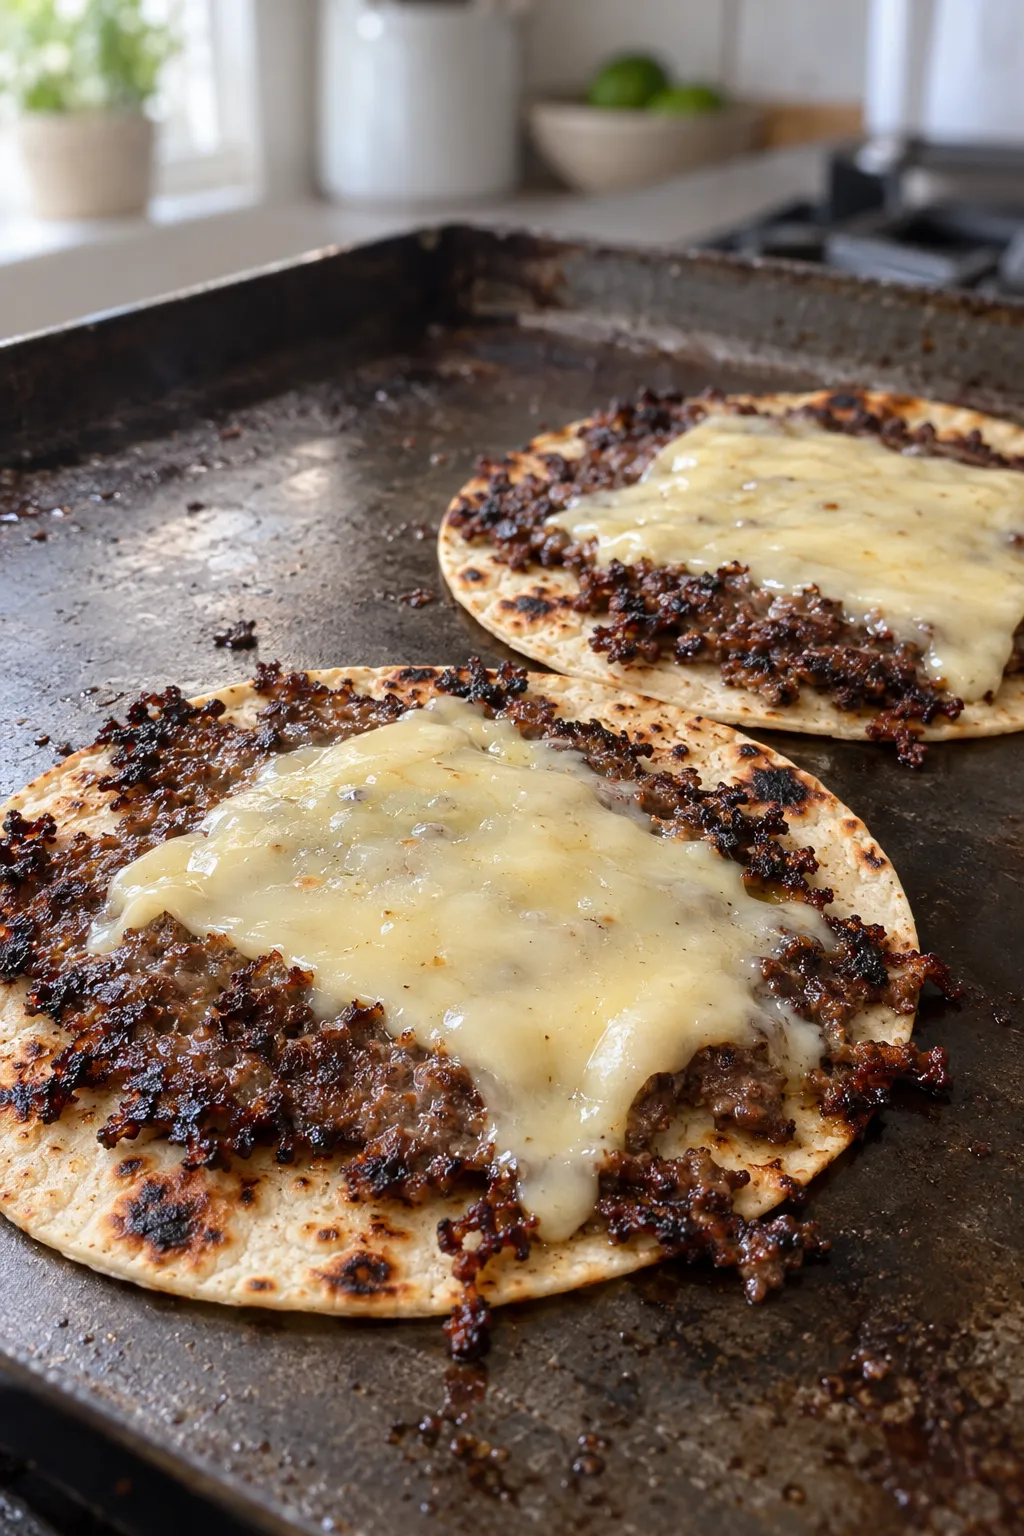
Step 8: Sauce, pile and fold
Spoon the burger sauce over the melted cheese while it is still hot, then pile on lettuce, onion, pickles and tomato. Fold it and eat it standing at the stove if you have any sense. These are best within a minute of leaving the pan, while the tortilla still makes a noise.
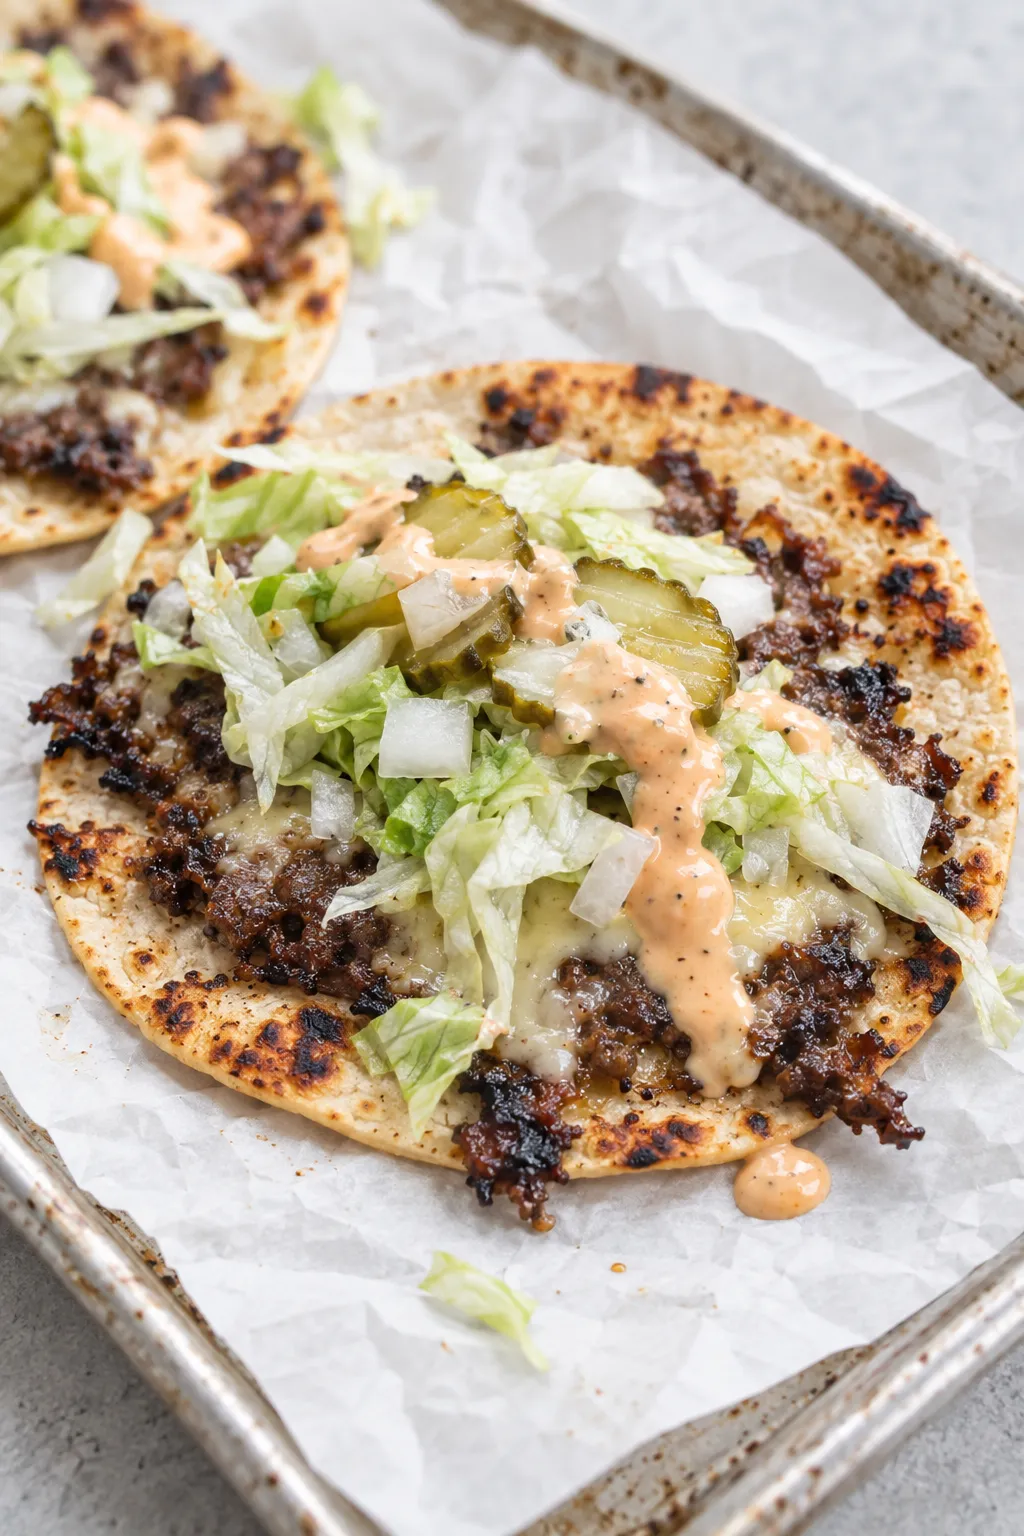
Tips for the Best Smash Burger Tacos
- Heat the pan longer than feels reasonable. Almost every disappointing batch comes down to a skillet that was not hot enough. Five full minutes on high.
- Press once, hard, and early. Smash within the first few seconds of the beef hitting the pan. Once the bottom has started to set you cannot spread it thin any more.
- Use a stiff metal spatula. A flexible plastic one will bend and leave the best part of the crust welded to the skillet.
- Two at a time, no more. The pan temperature drops with every patty you add.
- Keep the toppings cold. The contrast between the hot beef and the fridge-cold lettuce and sauce is what makes these taste like a proper burger.
- Wipe the pan between batches. A quick swipe with a folded paper towel held in tongs stops the leftover fat from smoking and turning bitter.
Variations
- Caramelised onion version. Cook two diced yellow onions in butter with a splash of Worcestershire for twenty minutes, then use them instead of raw onion and stir a spoonful into the sauce.
- Bacon cheeseburger tacos. Crumble two crisp slices of bacon over the cheese before you fold.
- Jalapeno popper. Swap the American cheese for pepper jack and add pickled jalapenos.
- Big Mac style. Two thinner patties per tortilla and a scattering of dehydrated onion in the sauce.
- Ground turkey or chicken. It works, but add a tablespoon of oil to the pan since there is no fat to render.
What to Serve With Smash Burger Tacos
These are rich, so I keep the sides simple and a little sharp. Crispy oven sweet potato fries are the obvious partner and they bake while you are mixing the sauce. A bowl of coleslaw with plenty of vinegar works, as does nothing more than a pile of extra pickles and something cold to drink. If you are feeding a crowd, a tray of corn on the cob and a big bowl of tortilla chips fills the table without any more stove time.
Storage and Reheating
Smash burger tacos are not a make-ahead dish and I will not pretend otherwise – the crisp tortilla is the whole reason to make them and it does not survive the refrigerator. What you can do is prep everything in advance. The sauce keeps for five days in a sealed jar. The seasoned beef balls can be rolled, covered and refrigerated for up to a day. The lettuce, onion and pickles can be prepped the morning of.
If you do end up with cooked leftovers, store the plain tacos without toppings in an airtight container for up to two days and reheat them in a dry skillet over medium heat for two minutes a side, or in an air fryer at 350°F for three minutes. Never the microwave – it turns the tortilla to leather. Add the cold toppings after reheating.
Frequently Asked Questions
Why did my tortilla not get crispy?
Almost always the beef was too lean. With 90/10 there simply is not enough rendered fat for the tortilla to fry in. The other cause is a pan that was not hot enough, so the fat never rendered fast enough to soak in before the tortilla dried out.
Can I use corn tortillas?
You can, but they behave differently. Corn tortillas do not bond to the meat the way flour does and they tend to crack when you fold them. If corn is what you have, warm them first so they are pliable and expect a taco that comes apart more easily.
Do I need a burger press?
No. A wide stiff metal spatula pressed down with your other hand on top of it works perfectly well. A heavy flat-bottomed saucepan also does the job. What you cannot use is anything flexible.
Can I make these on a flat top griddle?
Yes, and it is arguably the better tool because you can cook six at once without the temperature dropping. Preheat it on high and keep one zone slightly cooler so you have somewhere to move the tacos once you flip them and add the cheese.
How do I keep them warm for a crowd?
Hold the cooked, un-topped tacos on a wire rack set over a baking sheet in a 200°F oven for up to twenty minutes. The rack matters – stacking them on a plate traps steam and softens the crust immediately. Sauce and top them only as you serve.
More Comfort Food Recipes You Will Love
- Philly Cheesesteak Pasta – the same beefy, cheesy idea in a skillet of noodles.
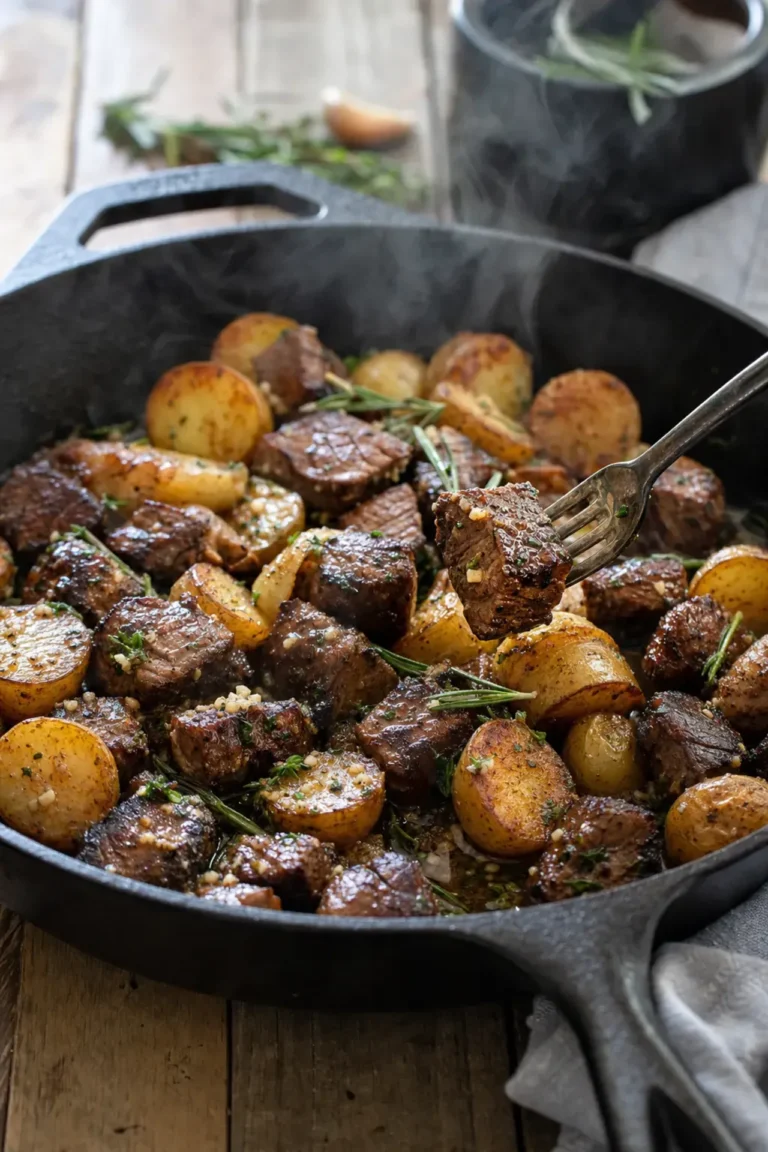
- Garlic Butter Steak Bites and Potatoes – another fast, high-heat cast iron dinner.
- Crock Pot Cowboy Casserole – ground beef comfort food with almost zero effort.
- Crispy Oven Sweet Potato Fries – the side these tacos were waiting for.

Smash Burger Tacos
Ingredients
For the Burger Sauce
- 3/4 cup mayonnaise
- 3 tbsp ketchup
- 1 tbsp yellow mustard
- 2 tbsp dill pickles finely chopped
- 1 tbsp dill pickle brine
- 1 tsp Worcestershire sauce
- 1 tsp paprika
- 1/2 tsp garlic powder
- 1/2 tsp onion powder
- 1/4 tsp black pepper
For the Tacos
- 1 1/2 lb ground beef 80/20, cold from the fridge
- 1 1/2 tsp kosher salt
- 1 tsp black pepper freshly ground
- 1 tsp garlic powder
- 8 flour tortillas 6-inch street taco size
- 8 slices American cheese
- 1 tbsp neutral oil only if your pan is not well seasoned
For Topping
- 2 cups iceberg lettuce finely shredded
- 1/2 cup white onion finely diced
- 1/2 cup dill pickle chips
- 1 Roma tomato diced, optional
Instructions
Make the Burger Sauce
- Whisk the mayonnaise, ketchup, mustard, chopped pickles, pickle brine, Worcestershire, paprika, garlic powder, onion powder and black pepper together in a small bowl until completely smooth and evenly pale orange. Cover and refrigerate while you cook – it tastes noticeably better after twenty minutes in the cold.

- Shred the lettuce, dice the onion and set the pickles out now. Once the skillet is hot these tacos come off the pan one after another and you will not have a spare thirty seconds to chop anything.
Shape the Patties
- Mix the salt, pepper and garlic powder in a small bowl. Divide the cold ground beef into 8 equal portions, about 3 ounces each, and roll each one into a loose ball. Handle the meat as little as possible – packed, over-worked balls turn out tough.

- Season the balls all over with the seasoning mix and put them back in the refrigerator until the skillet is properly hot. Cold beef against a screaming hot pan is what gives you that lacy brown crust.
Smash and Cook
- Set a large cast iron skillet or griddle over high heat and leave it there for a full 5 minutes, until a drop of water skitters across the surface and vanishes. Leave it dry unless your pan is new or poorly seasoned – the beef renders plenty of fat on its own.
- Place one beef ball in the skillet, lay a flour tortilla directly on top of it, and press down hard with a sturdy metal spatula or burger press until the meat spreads all the way to the edges of the tortilla. Hold the pressure for about ten seconds. Work in batches of two so the pan never loses its heat.

- Cook undisturbed for 3 to 4 minutes. The edges of the beef will turn dark brown and lacy and the rendered fat will soak up into the tortilla. Slide a stiff metal spatula underneath and scrape rather than lift – the whole crust should come away with the taco, not stay stuck to the pan.

- Flip the taco so the tortilla side is down, then immediately turn the heat to low. Lay a slice of American cheese on the beef and let it sit for 1 to 2 minutes, until the cheese slumps and the tortilla puffs and crisps. Turn the burner off entirely if the tortilla is browning faster than the cheese is melting.
Assemble and Serve
- Move the taco to a plate and spoon a generous stripe of burger sauce over the melted cheese while everything is still hot.
- Pile on shredded lettuce, diced onion, pickle chips and tomato if you are using it. Fold and eat immediately – smash burger tacos are at their best about thirty seconds out of the pan, while the tortilla still crackles.

Notes
Did you make this recipe? Leave a star rating below and tell me how it turned out – I love hearing which variation you went with.


Sarah Mitchell is the home cook and recipe developer behind Kitchen Love Story, a food blog dedicated to easy, comforting recipes that real families actually love. After years of searching for simple weeknight dinner ideas that didn’t require a culinary degree or a grocery list a mile long, Sarah decided to start creating and sharing her own. Her recipes focus on accessible ingredients, straightforward techniques, and big, satisfying flavors — the kind of food that brings people together. When she’s not testing recipes in her kitchen, Sarah enjoys meal prepping on Sundays, exploring farmers markets, and convincing her family to try at least one new dish a week. She lives with her family and a very enthusiastic golden retriever who considers himself the official taste tester.