The Best Garlic Butter Pot Roast (Fall-Apart Tender Every Time)
This post may contain affiliate links. Read my disclosure policy.

There is a moment in every pot roast cook — somewhere around hour three, when the smell has taken over the entire house — that I genuinely believe it is the greatest thing I have ever made. My family starts hovering in the kitchen. My husband asks “is it done yet?” at least four times. And when I finally pull that Dutch oven out of the oven and lift the lid, the steam rolls out and everyone goes quiet for a second.
That moment is why I keep coming back to this recipe.
I have been making pot roast for years, and this garlic butter version is the one I have landed on as my forever recipe. The twist is simple: after searing the beef, I make a quick garlic herb butter right in the same pan and use it to coat the roast before it goes into the oven. Those buttery, garlicky drippings melt down into the braising liquid as it cooks, and the result is the richest, most deeply flavored gravy you have ever tasted — no flavor packets, no soup cans, just real ingredients doing real things.
This is comfort food at its absolute best. And the best part? Most of the cook time is completely hands-off.
Why You’ll Love This Garlic Butter Pot Roast
- Fork-tender beef — slow braising breaks down the tough connective tissue in chuck roast so it literally falls apart
- One pot from start to finish — sear, braise, and make gravy all in the same Dutch oven
- The garlic butter trick — a small extra step that creates an incredibly rich, glossy gravy
- No packets or canned soups — fresh ingredients only, and you can taste the difference
- 3 cooking methods — oven, slow cooker, or Instant Pot instructions all included below
- Great for meal prep — leftovers are even better the next day and freeze beautifully
What Cut of Beef Is Best for Pot Roast?
This is the most important decision you will make for this recipe, so let’s talk about it.
Chuck roast is the undisputed winner for pot roast. It comes from the shoulder of the cow, and it has beautiful fat marbling running through it. That fat is exactly what you want — as the roast slow cooks, the fat melts and bastes the meat from the inside, keeping it moist and adding incredible flavor to the gravy. A 3 to 4 pound chuck roast is my go-to size. It feeds a family of 4 to 6 and leaves enough leftovers for the next day.
Other cuts that work well:
- Round roast — leaner than chuck, still works but the gravy will be slightly less rich
- Rump roast — similar to round, a good budget option
- Brisket — flat-cut brisket makes a wonderful pot roast, just be aware it takes about 30 minutes longer
Avoid anything labeled “stew meat” or pre-cut cubes for this recipe. You want a whole roast so it can braise properly and stay juicy.

Ingredients You’ll Need
Here is everything you need, plus my notes on each one:
For the roast:
- 3 to 4 lb chuck roast — look for one with good marbling (fat running through the meat in white streaks). The more marbling, the more flavor.
- Salt and black pepper — season generously. You need more than you think. Season all four sides of the roast, not just the top.
- 2 tablespoons olive oil — for searing. Vegetable oil or avocado oil also works.
- 4 tablespoons unsalted butter — this is the key to the garlic butter twist. Use real butter, not margarine.
- 6 cloves garlic, minced — fresh garlic only here. Garlic powder is fine in a pinch, but fresh garlic in that butter baste is the whole point.
- 1 tablespoon fresh rosemary, chopped — rosemary loves beef. Fresh is much better than dried for this recipe.
- 1 tablespoon fresh thyme leaves — same as rosemary. Fresh thyme has a brightness that dried thyme just doesn’t have.
For braising:
- 1 large yellow onion, roughly chopped — the onion essentially dissolves into the gravy as it cooks, giving it a natural sweetness and body.
- 3 celery stalks, cut into 3-inch pieces — adds depth to the braising liquid.
- 2 cups beef broth — use a good quality low-sodium broth so you can control the salt level.
- 1 cup dry red wine — Cabernet Sauvignon or Merlot work great. Use something you’d actually drink. If you prefer no wine, replace with 1 more cup of beef broth.
- 2 tablespoons tomato paste — this is a small addition with a huge impact. It adds a deep, savory richness and helps the gravy develop beautiful color.
- 2 bay leaves — classic braising ingredient, adds a subtle herbal background note.
- 1 tablespoon Worcestershire sauce — pure umami. This makes the whole thing taste more “beefy” without being obvious.
Vegetables (added later):
- 1.5 lbs baby potatoes (or Yukon Gold, halved) — baby potatoes hold their shape the best. Russets get softer but still taste great if that’s what you have.
- 4 large carrots, cut into 2-inch chunks — cut them thick so they don’t turn to mush. Thin carrot slices will completely disintegrate after 2 hours in the oven.
For the gravy (optional but highly recommended):
- 2 tablespoons cornstarch
- 2 tablespoons cold water
How to Make Garlic Butter Pot Roast — Step by Step
Step 1: Pat the roast dry and season generously
Take your chuck roast out of the refrigerator 30 minutes before cooking and let it come closer to room temperature. This helps it sear more evenly.
Using paper towels, pat all sides of the roast completely dry. This is a non-negotiable step — a wet roast will steam instead of sear, and you will lose that beautiful dark brown crust that is the foundation of your entire flavor.
Season every side of the roast liberally with salt and freshly cracked black pepper. I mean really season it. You should see a visible coating of seasoning on all sides.
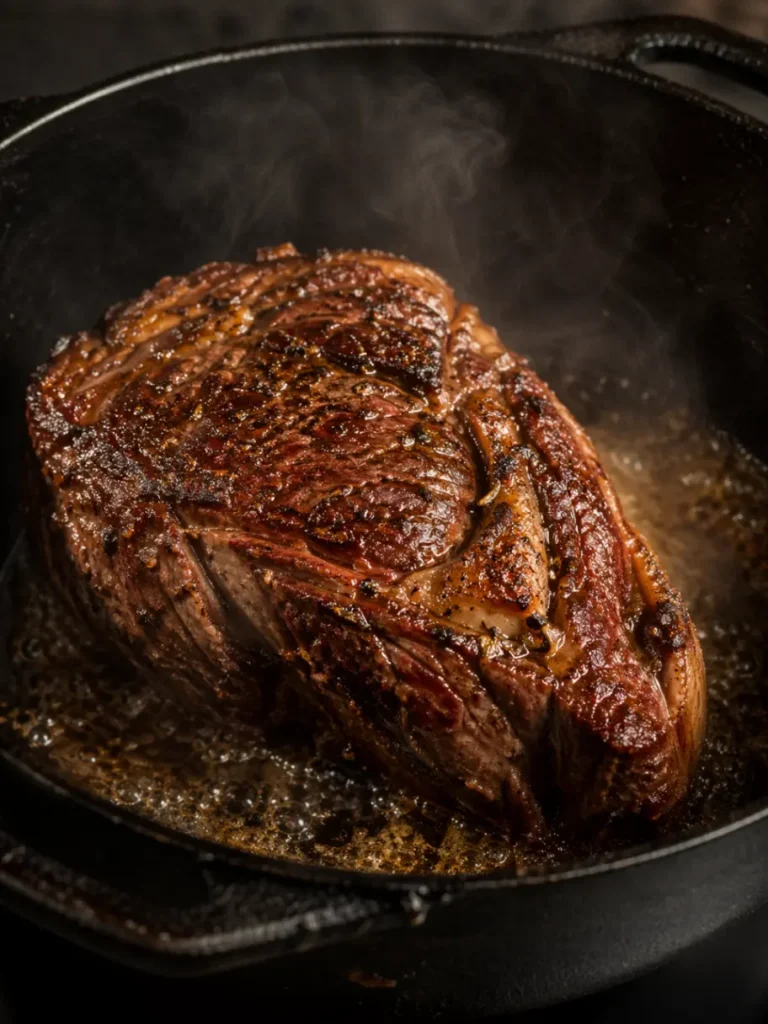
Step 2: Sear the roast
Preheat your oven to 325°F (163°C).
Heat 2 tablespoons of olive oil in a large Dutch oven over medium-high heat. You want the oil to be shimmering and almost smoking before you add the beef.
Carefully place the roast in the pot. Do not move it. Let it sear undisturbed for 4 to 5 minutes per side until a deep, dark brown crust has formed. You are looking for a genuine dark brown, not a pale gray. That crust is called the Maillard reaction, and it is where most of your flavor comes from.
Sear all four sides of the roast, then remove it to a plate and set aside. Turn the heat down to medium.
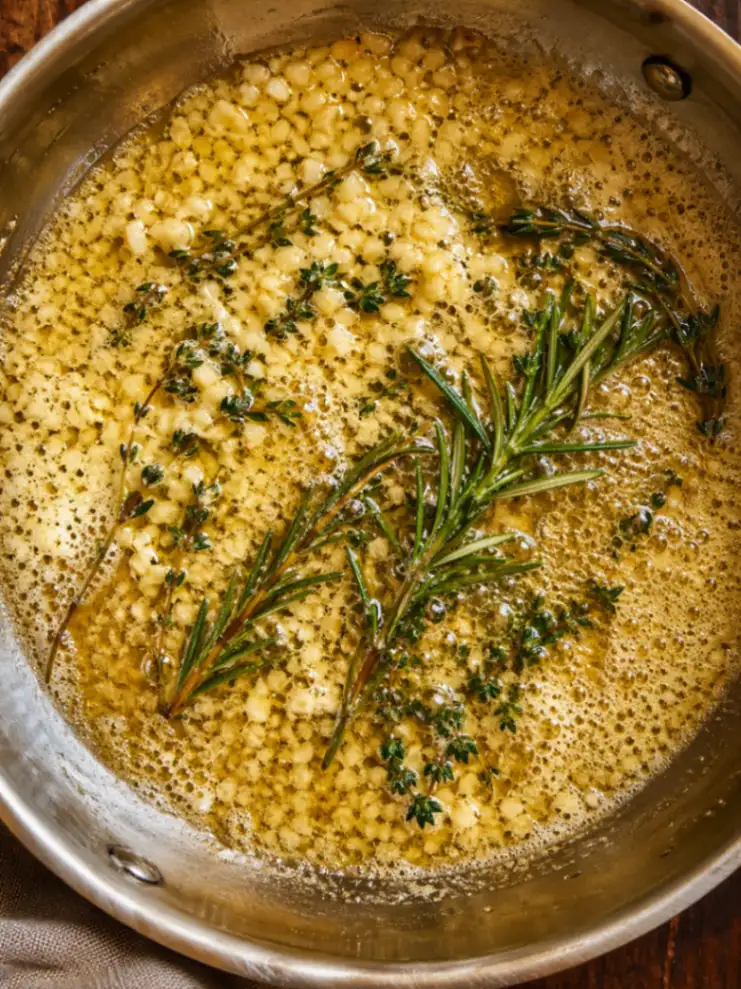
Step 3: Make the garlic butter baste
With the heat reduced to medium, add 4 tablespoons of butter to the same Dutch oven (still filled with all those beautiful beef drippings — do not clean the pan).
Once the butter melts, add the minced garlic, rosemary, and thyme. Stir and cook for about 60 to 90 seconds, just until the garlic becomes fragrant. Watch it carefully here — garlic goes from fragrant to burnt very quickly.
Now return the seared roast to the pot and use a spoon to baste the entire roast with the garlic herb butter. Spoon it over the top and sides repeatedly for about 30 seconds. This is the step that makes this recipe different. That garlic butter is going to melt down into the braising liquid over the next 3 to 4 hours and infuse the entire gravy with an incredible depth of flavor.
Step 4: Add the braising liquid
Add the chopped onion and celery around the roast.
In a small bowl or measuring cup, whisk together the beef broth, red wine, tomato paste, and Worcestershire sauce until the tomato paste is fully dissolved. Pour this mixture into the pot. It should come up about halfway up the sides of the roast — not fully submerging it.
Drop in the 2 bay leaves. Bring everything to a gentle simmer over medium heat on the stovetop.
Step 5: Braise in the oven — first round
Cover the Dutch oven with the lid and place it in the preheated 325°F oven.
Braise for 2 hours undisturbed. Do not peek. The lid creates a steamy environment inside the pot that braises the meat low and slow — opening it releases that steam and disrupts the cooking.

Step 6: Add the vegetables
After 2 hours, carefully remove the Dutch oven from the oven. Add the baby potatoes and carrot chunks around the roast, nestling them into the braising liquid. They don’t all have to be submerged — they will steam and absorb liquid as they cook.
Cover the pot again and return to the oven. Braise for another 1.5 to 2 hours, until both the roast and the vegetables are completely fork-tender.
How to know when it’s done: Insert a fork into the thickest part of the roast and give it a small twist. If the meat falls apart easily with almost no resistance, it is done. If there is still some firmness, put it back in for another 20 to 30 minutes and test again. Every roast is slightly different and timing can vary.
Step 7: Make the gravy
This step is optional if you are happy with the thin braising juices as-is — they are delicious on their own. But if you want a proper, thick gravy (and you do), here is how:
Remove the roast and vegetables from the pot and set them on a serving platter or cutting board, covered loosely with foil to keep warm.
Discard the bay leaves. If the braising liquid is very fatty, you can use a fat separator or simply tilt the pot and skim some of the fat from the surface with a spoon.
Bring the braising liquid to a boil over medium-high heat on the stovetop.
In a small bowl, whisk 2 tablespoons cornstarch with 2 tablespoons cold water until completely smooth. This is your slurry.
Pour the slurry slowly into the boiling braising liquid, whisking constantly, until the gravy reaches your desired thickness. It will thicken quickly — usually within 1 to 2 minutes. Taste and adjust seasoning with salt and pepper.

Step 8: Serve
Use two forks to pull the roast apart into large, rustic chunks or slice it thick, depending on your preference. Arrange on a platter with the vegetables, pour a generous amount of gravy over everything, and serve immediately.
Slow Cooker Pot Roast Method
To make this in the slow cooker, follow Steps 1 through 3 exactly as written (the sear and garlic butter baste are still worth doing — don’t skip them). Then transfer everything to a 6-quart slow cooker.
Reduce the beef broth to 1 cup (you need less liquid in a slow cooker because there is less evaporation).
Cook on LOW for 8 to 10 hours or HIGH for 5 to 6 hours. Add vegetables during the last 2 to 3 hours so they don’t overcook into mush. Low and slow always produces more tender results.
Instant Pot / Pressure Cooker Method
Use the Sauté function for Steps 1 through 3. Then add the braising liquid (no need to reduce the amount for the Instant Pot).
Cut the roast into 3 to 4 large chunks — this helps it cook more evenly under pressure.
Seal the lid and cook on High Pressure for 60 minutes. Allow a 15-minute natural pressure release, then release remaining pressure manually.
Add the vegetables, seal, and cook on High Pressure for an additional 8 minutes, then quick release.
Make the gravy using the Sauté function.
Tips for the Best Pot Roast
Choose a roast with visible marbling. The fat that runs through chuck roast melts during the long braise and keeps the meat moist. A very lean roast will turn dry no matter how carefully you cook it.
Don’t rush the sear. I know it is tempting to flip the roast early, but resist. A proper sear takes 4 to 5 minutes per side. If the roast sticks to the pan when you try to flip it, it is not ready — it will naturally release when it has properly browned.
Keep the oven temperature at 325°F. Pot roast is a low-and-slow situation. A higher temperature dries the meat out. A lower temperature will just take much longer. 325°F is the sweet spot.
Cut vegetables large. Thin carrot coins and small potato pieces will turn to complete mush after 2 hours in the oven. Cut your carrots into 2-inch chunks and use whole baby potatoes — they hold their shape far better.
Use wine if you can. Even just one cup of red wine transforms the braising liquid from good to extraordinary. The alcohol cooks off completely during the long braise, so the finished dish has zero alcohol. What’s left is a depth of flavor you simply cannot replicate with broth alone.
Make it a day ahead. Pot roast is one of those magical dishes that genuinely tastes better the next day. The flavors meld and deepen overnight. Store it in the braising liquid in the fridge, then gently reheat on the stovetop.
Variations and Additions
Add mushrooms — cremini or baby bella mushrooms added with the vegetables in hour 3 absorb the braising liquid like little flavor sponges. So good.
Make it a Mississippi pot roast — add 1 packet of ranch seasoning, 4 to 5 pepperoncini peppers, and replace the butter baste with a stick of butter laid directly on top of the roast before it goes into the oven.
Add parsnips — parsnips are underrated in a pot roast. They taste like a slightly sweet, nutty carrot and add variety to the vegetable mix.
Add turnips or sweet potatoes — turnips keep their shape well and add an earthy depth. Sweet potatoes get very soft but add a subtle sweetness that balances the savory gravy.
Make it gluten-free — this recipe is naturally gluten-free. Just double-check your beef broth and Worcestershire sauce labels, as some brands contain gluten.
Make it without wine — replace the red wine with 1 additional cup of beef broth plus 1 tablespoon of balsamic vinegar. The balsamic adds some of that depth and slight acidity that the wine provides.

What to Serve with Pot Roast
The gravy from this pot roast is basically liquid gold, so you want something that can soak it up.
- Mashed potatoes — the classic pairing and for very good reason. Creamy mashed potatoes and pot roast gravy is one of the great food combinations.
- Buttered egg noodles — a close second to mashed potatoes, and a great option if you want something a little different.
- Crusty bread — a thick slice of sourdough or a crusty dinner roll for soaking up gravy is never wrong.
- Creamy polenta — an underrated pairing. The richness of the gravy against soft polenta is incredible.
- Steamed or roasted green beans — something green brightens the plate and balances all that richness.
- Dinner rolls — soft, fluffy rolls for the table are always a crowd-pleaser.
How to Store and Reheat Leftovers
Refrigerator: Store leftover pot roast along with the vegetables and gravy in an airtight container in the refrigerator for up to 4 days. Always store the meat in the gravy — this keeps it moist.
Freezer: Pot roast freezes beautifully. Store in a freezer-safe container or zip-lock bag with as much of the gravy as possible. Freeze for up to 3 months. Thaw overnight in the refrigerator before reheating.
Reheating: The best way to reheat pot roast is gently on the stovetop over medium-low heat with a splash of extra beef broth to loosen the gravy. You can also reheat in the microwave — cover the container and heat in 60-second intervals, stirring in between, until warmed through.
Leftover ideas: Leftover pot roast makes the most incredible sandwiches. Pile shredded beef and gravy onto a toasted hoagie roll for a French dip-style sandwich. It is also great stirred into beef noodle soup, folded into pot roast tacos, or served over rice.
Frequently Asked Questions
What is the best cut of beef for pot roast? Chuck roast is the best choice by a wide margin. It has the right fat content and connective tissue to become incredibly tender during the long braise. Rump roast and round roast are acceptable alternatives but will produce a slightly leaner, less rich result.
Do I have to sear the meat first? Technically no — you can skip the sear. But I strongly recommend against it. The sear is where most of the flavor is developed. The Maillard reaction creates hundreds of flavor compounds that you simply cannot get any other way. The extra 10 minutes is absolutely worth it.
Can I make pot roast without wine? Yes. Replace the red wine with 1 additional cup of beef broth plus 1 tablespoon of balsamic vinegar. The balsamic approximates the depth and acidity that wine provides.
My roast is tough — what went wrong? If your pot roast is tough, it almost certainly needs more time. Unlike other cuts where overcooking makes things tough, chuck roast gets more tender the longer it cooks (up to a point). If it’s tough at the 3-hour mark, put it back in for another 30 to 45 minutes. Low and slow wins every time.
Can I make this in a crockpot? Yes! See the slow cooker instructions in the recipe section above. Reduce the liquid to 1 cup of broth, and cook on LOW for 8 to 10 hours. The sear is still worth doing even for a slow cooker version.
My gravy is too thin — how do I fix it? Make more cornstarch slurry (1 tablespoon cornstarch + 1 tablespoon cold water), bring the gravy to a boil, and whisk in the slurry gradually until it reaches your desired consistency.
Can I cook a frozen roast? No — start with a fully thawed roast. A frozen roast will not sear properly and will cook unevenly. Thaw it in the refrigerator overnight before cooking.
How much pot roast do I need per person? Plan for about ½ pound of raw chuck roast per person. A 3-pound roast feeds about 5 to 6 people when served with vegetables and potatoes. A 4-pound roast feeds about 6 to 8.
Can I double this recipe? Yes, but you will need a very large Dutch oven (at least 8 quarts) or you can split it between two pots. Cooking time will be the same — the oven does the work regardless of quantity.
What’s the difference between pot roast and a Sunday roast? A pot roast is braised (cooked low and slow in liquid), which makes the meat incredibly tender and falling apart. A Sunday roast is typically roasted dry in the oven at a higher temperature, producing a firmer, sliceable roast with a different texture. Both are delicious — they’re just different techniques.
If you end up with leftover pot roast, this is exactly what you should do with it — a home cook on Reddit made this incredible pot roast sandwich with melted Gruyere and Swiss and it looks absolutely amazing.
More Cozy Dinner Recipes You’ll Love
(Add links to your other recipes here as you publish them)
- Easy Slow Cooker Beef Stew
- Crockpot Mississippi Pot Roast
- Dutch Oven Chicken Thighs
- Beef and Noodles
- Classic Beef Stew

The Best Garlic Butter Pot Roast
Ingredients
- 3-4 lbs chuck roast
- 1½ teaspoons salt
- 1 teaspoon black pepper
- 2 tablespoons olive oil
- 4 tablespoons unsalted butter
- 6 cloves garlic minced
- 1 tablespoon fresh rosemary finely chopped
- 1 tablespoon fresh thyme leaves
- 1 large yellow onion roughly chopped
- 3 celery stalks cut into 3-inch pieces
- 2 cups beef broth low-sodium
- 1 cup dry red wine
- 2 tablespoons tomato paste
- 1 tablespoon Worcestershire sauce
- 2 bay leaves
- 1½ lbs baby potatoes
- 4 large carrots cut into 2-inch chunks
- 2 tablespoons cornstarch
- 2 tablespoons cold water
Instructions
- Pat the chuck roast completely dry with paper towels. Season all sides generously with salt and black pepper. Remove from refrigerator 30 minutes before cooking. Preheat oven to 325°F (163°C).
- Heat olive oil in a large Dutch oven over medium-high heat until shimmering. Sear the roast for 4-5 minutes per side without moving it, until deeply browned on all four sides. Remove to a plate and set aside.
- Reduce heat to medium. Add butter to the same Dutch oven. Once melted, add garlic, rosemary, and thyme. Cook for 60-90 seconds until fragrant. Return the roast to the pot and spoon the garlic butter over all sides repeatedly for 30 seconds.
- Add onion and celery around the roast. Whisk together beef broth, red wine, tomato paste, and Worcestershire sauce until combined. Pour into the pot. Add bay leaves. Bring to a gentle simmer on the stovetop.
- Cover with lid and transfer to the preheated 325°F oven. Braise for 2 hours without opening the lid.
- Remove from oven. Add baby potatoes and carrot chunks around the roast, nestling them into the liquid. Cover and return to oven. Braise for another 1.5 to 2 hours, until roast and vegetables are completely fork-tender. Test by inserting a fork and twisting — it should fall apart easily.
- Remove roast and vegetables from the pot. Discard bay leaves. Bring braising liquid to a boil on the stovetop. Whisk cornstarch with cold water until smooth, then pour slowly into the boiling liquid while whisking constantly until thickened. Season with salt and pepper to taste.
- Pull roast apart with two forks into large chunks or slice thick. Serve with vegetables and pour gravy generously over everything.
Notes

Sarah Mitchell is the home cook and recipe developer behind Kitchen Love Story, a food blog dedicated to easy, comforting recipes that real families actually love. After years of searching for simple weeknight dinner ideas that didn’t require a culinary degree or a grocery list a mile long, Sarah decided to start creating and sharing her own. Her recipes focus on accessible ingredients, straightforward techniques, and big, satisfying flavors — the kind of food that brings people together. When she’s not testing recipes in her kitchen, Sarah enjoys meal prepping on Sundays, exploring farmers markets, and convincing her family to try at least one new dish a week. She lives with her family and a very enthusiastic golden retriever who considers himself the official taste tester.